Launcher signing
To reduce the frequency of antivirus programs flagging your Launcher, it needs to be signed with a Code Signing certificate. Ideally, you should contact one of the many trusted certification authorities to obtain this certificate. However, to start, we will sign our launcher with a self-signed certificate.
Certificate Generation
For a convenient and user-friendly interface, we will use XCA. Download and install it.
- First, go to the
Filemenu and selectNew Database. Name it as you like and place it wherever you want. - In the
Certificatestab, click onNew Certificate. Now we will create a root certificate. - Go to the
Subjecttab and fill in thecommonNamefield (e.g.,ServerMC Root CA), this is required. Other fields are optional. - At the bottom, you will see the
Generate a new keybutton. Select the key typeRSAand length4096 bit. A new key must be created for each new certificate. - Go to the
Extensionstab, selectCertification Authorityfrom theTypelist. In theValidity Periodsection, specify how many years the certificate will be valid. The typical validity period for a root certificate is between 10 and 50 years. Don't forget to clickApplyto calculate the dates. - Go to the
Key Usagetab and selectCertificate SignandCRL Signin the left column. - Go to the
Netscapetab, nothing should be filled in or selected here. - Create the root certificate by clicking
OK. - To enhance security, you can create an intermediate certificate. To do this, repeat the steps above, but in the
Signingsection, specify the root certificate. All subsequent certificates should have a shorter validity period than the root certificate. - Create a Code Signing certificate by specifying the intermediate certificate (or root certificate) in the
Signingsection. - Fill in the
Subjecttab similarly. - In the
Extensionstab, selectEnd Entityfrom theTypelist. Set the validity period as desired. - In the
Key Usagetab, selectDigital Signaturein the left column andCode SigningandMicrosoft Individual Code Signingin the right column. - Create the Code Signing certificate by clicking
OK. - Select the Code Signing certificate and click
Exportin thePKCS#12 chainformat. Remember the password, as it will be needed for setting upcertificatePassword.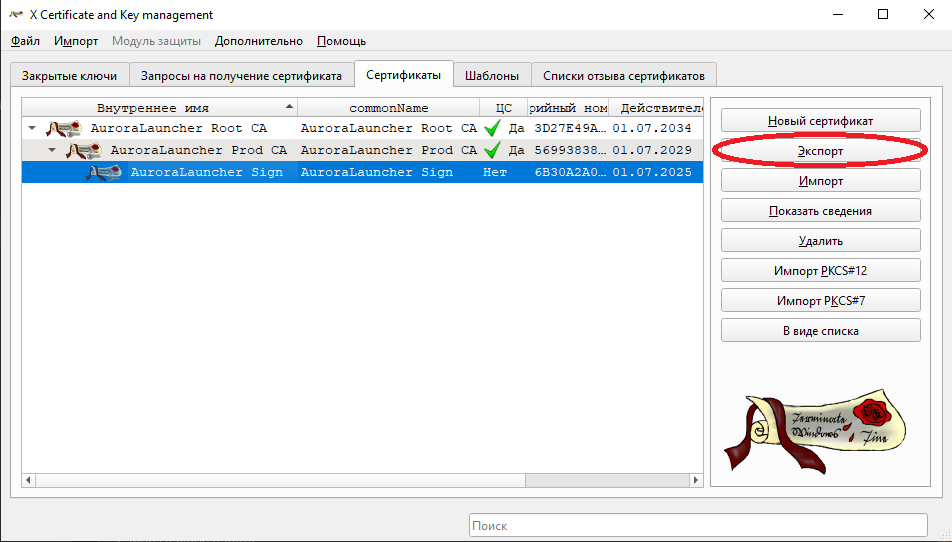
Executable file signing
After generating the certificate, we drop it into the ssl folder (or any other) and edit the script/electron-build.ts file. We look for these lines
ts
"nsis": {
            "artifactName": "${name}-Setup-${version}.${ext}"
},And add these lines after.
ts
"win": {
            "target": "nsis",
            "signingHashAlgorithms": [
                "sha256"
            ],
            "certificateFile": "./ssl/Sign.pfx",
            "certificatePassword": "password"
        },
Description of config settings
target- leave unchangedsigningHashAlgorithms- what type of hash generation was used. If you generated a certificate leave unchangedcertificateFile- path to certificate filecertificatePassword- certificate passwordartifactName- installer file name mask